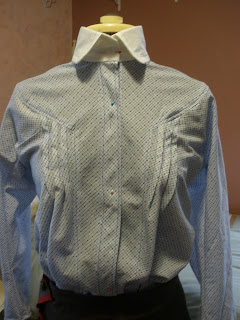

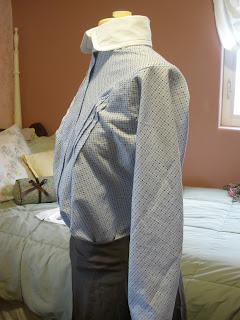
After taking a break from sewing for an archaeological dig in Israel (tons of fun, by the way!) I'm back at it again, and almost finished with the 1912 ladies blouse. This pattern didn't come with instructions, so it was a bit interesting figuring it out - it's not like any other blouse pattern I've ever sewn! I had a friend over one evening, and we spread out the pattern on the floor to mull over. Thanks to her brilliance, I was able to grasp the concept of the arm seam - there is one continuous seam that goes up the the side of the blouse, under the armhole, and down the sleeve. It was really quite simple once I understood it - simply slash the fabric where marked on the pattern piece, and starting either at the bottom of the side seam, or the end of the sleeve, sew until you reach the corner, miter the corner, sew until you reach the next corner, miter that corner, and sew to the end. One other difficulty that I had with this pattern was that the cuff pattern piece is missing, but it wasn't too hard to make a cuff piece. It seems that I had a bit of trouble with the pleats, but I did those before I left for Israel, and I forgot to take notes, so by now I've forgotten what the trouble was with them. All I have left to do is put on buttons - you'd think that with almost two gallons of vintage buttons, I'd be able to find some that would work, but no, so it's off to JoAnns I go! I had a lot of fun with this pattern, and I really like the end result - I think it's really cute! I might even add it to my real life wardrobe instead of relegating it to my costume bin!
Pattern Review Checklist:
- Pattern Description: Ladies
Blouse
- Pattern Sizing: I
didn’t change the sizing, since it was my size, and sure enough, it fits
me just right.
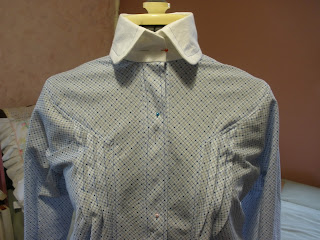
- Did it look like the photo/drawing on the pattern
envelope once you were done sewing it? Yes,
almost exactly.
- Were the instructions easy to follow? There were no instructions.
- What did you particularly like or dislike about the
pattern? It was a bit challenging to sew this
without instructions, but I love the way it turned out!
- Fabric Used: Cotton
- Pattern alterations or any design changes you made: None.
- Would you recommend this pattern to others? Absolutely!
- Conclusion: This was a fun
project that turned out really well.
VPLL Checklist
- Pattern Name: 0219
Blouse
- Sewer’s Skill Level:
Intermediate
- Pattern Rating: 1-Not a Fan, 2 – So-So, 3 –
Good/Average, 4-Better than Average,
5-I LOVED IT! and why? This is an unusual
pattern in terms of construction, but it worked really well.
- What skill level would someone need to sew this pattern
and why? Intermediate to advanced, due to the
unusual pattern.
- Were the instructions easy to follow? If not, what
needs to be changed? No instructions.
- How was the fit/sizing? Did it correspond to what
you thought? Yes, it turned out just how I
thought it would.
- Did you make any pattern alterations? If so, what
alterations did you make? Where they fit or design alterations? No alterations.


